Here is a laptop sleeve tutorial. It's simple and can be done in about an hour!
Materials:
1/2 yard exterior fabric (flower fabric from Hobby Lobby)
1/2 yard for lining (I used faux gray suede - super soft)
Scrap of fabric for flap
Batting
1 Button
Sewing Machine
Needle and thread (for button)
First, measure your laptop.
Mine is a 15" Macbook Pro so it ended up being 14.5" W x 10" H x 1" D
You will need to allow for seam allowance. I added 2.5 inches extra because I used double batting. Total equals = 17" W x 12.5" H
Step 1: Cut
Two rectangles of exterior fabric measuring 17" W x 12.5" H (or insert your numbers here)
One rectangle of scrap fabric for flap. You can make it the height you want, keeping the same width as everything else. So mine was 17" W x 7' H.
Two rectangles for lining:
One needs to be the same as the exterior, so 17" W x 12.5" H.
The other needs to be the same width, but you have to add the height of the flap and exterior piece together. So it will be 17" W x 19.5" H (12.5" + 7")
Four rectangles of batting that are the same as the exterior size = 17"W X12.5"H
You will have a total of 9 pieces of fabric/batting.
*It's better to have too much extra than not enough fabric!
Step 2: Overlap
Here you will pin the flap onto the WRONG side of your bigger lining piece. Make sure to line up the edge of flap to the edge of interior fabric. Hem all sides, then you will sew all sides. (See next step for alternative front flap hem) The lining that is still visible is the same size as the exterior pieces. So the back will be the exterior, then the flap will fold over to the front.
Step 3: Hem the Flap
OPTIONAL: Here I decided to hem the edge in the pattern of the chevron instead of just straight across. To do this cut the chevron so there is one strip (off-white for this fabric) extra that you can hem. You will need to cut only the extra strip at each point up to the next strip (yellow). Then just fold it up so the strip you want to see is visible. Press then stitch.
I did two lines just for fun :)
Step 4: 3 Pieces together
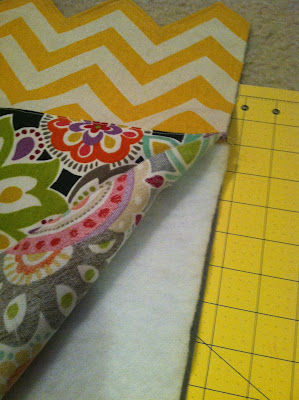
This step you will need to add one exterior piece to the piece with the flap. First, press the top edge (that will go long the flap). Then place the rectangle so the exterior and lining fabrics are wrong sides together, and sew only along the top edge where it barely overlaps the flap.
Step 5: Batting
Lift the exterior fabric up and place two pieces of batting in between the exterior and lining. Make sure to place it all the way up so it is against the seam by the flap.
Step 6: Layer
Layer all of your pieces together! Here you will place your largest piece (with the flap) lining right side down, with the batting on top, then the exterior piece that is already sewn together. Then place the other exterior piece on top right side down, two pieces of batting, then interior piece wrong side down. It will look like this:
Step 7: Pin and sew!
You will need to pin all three outsides together. It is super thick so make sure you get all the pieces lined up and pinned well. Stick your laptop in to make sure it fits and to see how much you can take it in. I could take in just under an inch on each side since I used extra at the beginning.* Sew along the edge. Cut off the extra fabric from the seam. Mine ended up being super snug (which was just what I wanted). When you are done, turn it right side out.
*I had to sew this a couple times before I got every layer all the way around since it was so thick. I just scooted in a tad more each time to get everything. Make sure to check to see how your laptop fits before you make it too tight.
Step 8: Button
Measure and mark where you want the button hole on the flap. My machine has a button hole foot so I just up it in the machine and it did it by itself (after I read all the instructions and did a test on a scrap of fabric). After that, place your laptop into the sleeve then fold over the flap. See where the button hole lines up and mark where the button will be. Sew on your button.
Now you have a super cute laptop sleeve! :)


.JPG)
.JPG)


.JPG)
Oh Hollianne, I just found this on Pinterst and totally knew it was yours. I repined by the way. I really need to remember to call you so we can catch up...
ReplyDelete-Emily